
Why this happens
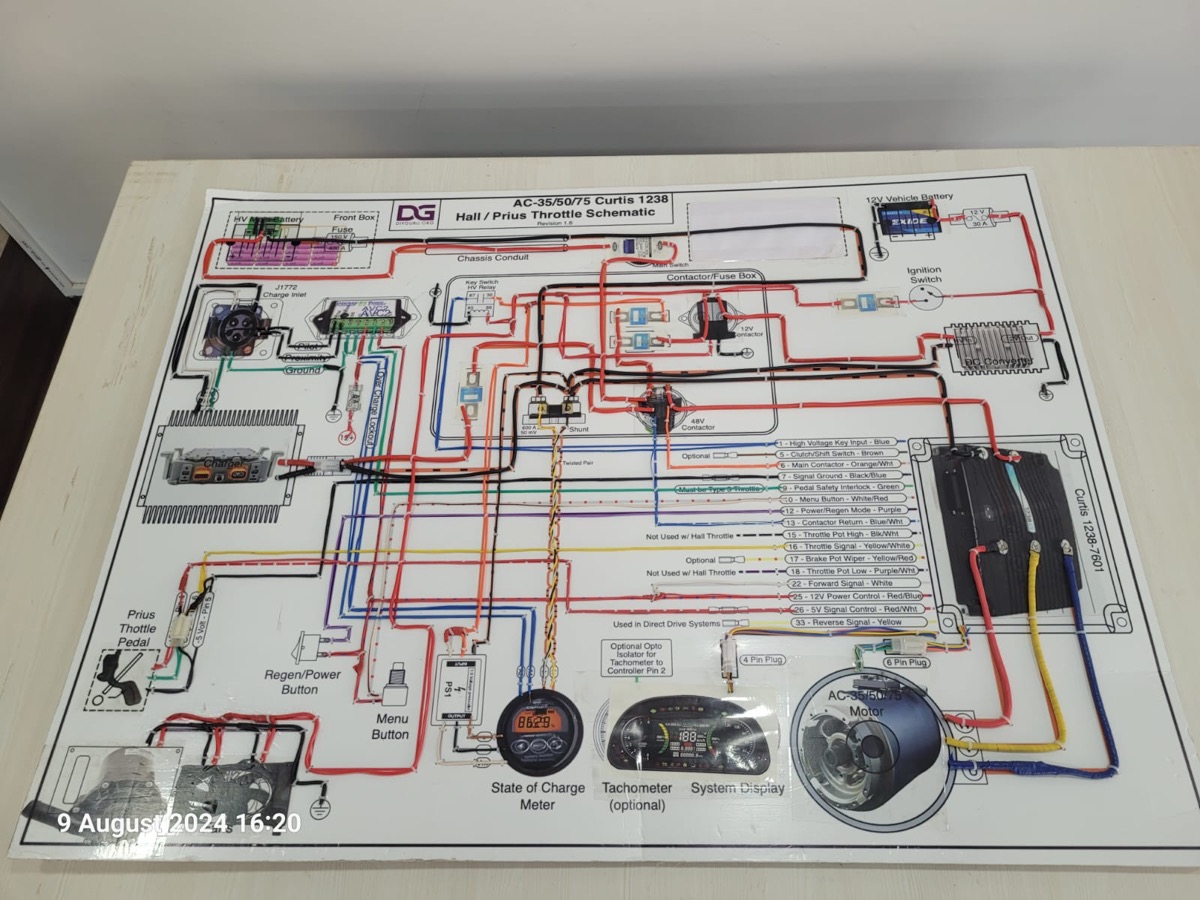
Most EV problems are found by following a signal from source to load, which is hard when you do not know where wires go. Manufacturers rarely publish full diagrams for two-wheelers. A diagram made from your own vehicle captures the real colours, connectors and routes, and the act of drawing it teaches you how the system fits together.
What you need
Tools
- Smartphone camera
- Torch
- Digital multimeter with continuity mode
- Insulated screwdrivers for removing body panels
Materials
- A3 paper and pencils, or free diagram software
- Small numbered labels
- Masking tape
- Notebook
Before you start
- Disconnect the battery before unplugging connectors or tracing wires.
- Remove only owner-removable panels; opening sealed parts may void warranty.
- Do not trace or probe the main battery cables, motor phases or high-voltage car wiring.
Step by step
- 1
Gather what is already documented
Read the owner's manual for any wiring or fuse information and note component names. Check the labels on the controller, charger, converter and display. List the main blocks you expect: battery, BMS output, controller, motor, throttle, brake switches, display, lights, horn, DC-DC converter and accessory socket.
- 2
Remove panels the manual allows
Switch off, remove the key and disconnect the battery where the manual allows. Remove only the panels that the manual says are owner-removable, keeping screws in labelled bags. Do not cut seals or open sealed components; that may void warranty. You only need to see wires and connectors, not inside parts.
- 3
Photograph everything before touching
Take clear photos of each connector, cable route and ground point from several angles before you unplug anything. Include a label or ruler for scale. These photos are your undo button if you forget how something went back, so keep them in one album named after the vehicle.
- 4
Label connectors and wires
Stick numbered labels on each connector and both ends of any wire you trace. Record each connector's number, pin count, wire colours and what it connects. Note which connectors are waterproof and which are open. This becomes the pin list that sits beside your diagram.
- 5
Trace low-voltage circuits with continuity
With the battery still disconnected, use the meter's continuity mode to confirm where a wire goes when the route is hidden. Unplug the connectors at each end so you test only that wire. Do not probe the main battery cables, motor phases or anything inside the battery enclosure.
- 6
Draw the block diagram
Start with a block diagram: boxes for each component and lines for the connections, battery at one side and loads at the other. Mark fuses, switches and ground points. Use colours that match the wires. Keep it tidy rather than to scale; the goal is clarity.
- 7
Add a pinout table for each connector
For each connector, draw a small table showing pin number, wire colour, signal name such as 5 V, ground or throttle signal, and where it goes. Note typical voltages later when you measure them. These tables are what you will use most during fault-finding.
- 8
Refit panels and store the diagram
Reconnect the battery, check everything works and refit the panels. Scan or photograph your diagram and store it with your photos in one folder on your phone or cloud. Update it whenever you add an accessory or repair something. Students can redraw it neatly in diagram software for a portfolio.
How to tell it worked
You have a block diagram, connector pinout tables and labelled photos that let you follow any low-voltage circuit from source to load, and the vehicle works exactly as before.
Stop and call a technician if
- Tracing a circuit would require opening the battery pack, controller or a sealed harness.
- You find damaged, melted or water-soaked wiring while mapping.
- The vehicle shows a fault after reconnecting that it did not show before.
Questions
Do I need special software?
No. Paper and pencil are fine. Free diagram tools help if you want a neat version to share or keep in a project report.
Should I include the battery's internal wiring?
No. Show the battery as one box with its external connector. Its internals and BMS are sealed and are not owner-serviceable.